 04 Sep 2024
Tags: Bread, Sourdough, Baking, British
Celebrate Sourdough September with Matthews Cotswold Flour: Join the Super Sourdough Club
This Sourdough September, Matthews Cotswold Flour, an 8th-generation British flour mill renowned for its commitment to regeneratively farmed ancient grains, invites bakers of all levels to embark on a delicious and nutritious adventure by joining the Super Sourdough Club represented by world-renowned sourdough baker Elaine Boddy. Whether you're a seasoned baker or a complete novice, there's no better time to discover the simplicity and satisfaction of homemade sourdough.
Matthews Cotswold Flour's Super Sourdough Club has a wealth of resources designed to help you perfect the ancient art of breadmaking. Free to all, members simply download a comprehensive Sourdough Journal packed with tips, early access videos, such as this sourdough starter recipe video, a step-by-step guide and recipes, ensuring a smooth and successful start to your sourdough journey.
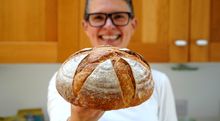
“Making sourdough is truly simple, so much simpler than many people think, and so very satisfying,” says Elaine Boddy, author of four sourdough cookbooks. “Using great flour is the best way to get the results that you want, whether it's in your starter or in your dough or both, and the new regenerative flours are absolutely perfect for both. They are great to work with, they not only produce fabulous results but they're wonderfully healthy and bake into very tasty loaves - what more could we want? Any day is a great day to start making sourdough, but as it's officially Sourdough September, what better time to give it a go?”
Elaine Boddy's master sourdough recipe and images is here and below.
Using wholegrain flour milled from ancient grains, sourdough bread is rich in fibre, vitamins, and minerals. Plus, the slow fermentation process of sourdough breaks down gluten and phytic acid, making the bread easier to digest and the nutrients more accessible.
Heritage grains from Matthews Cotswold Flour
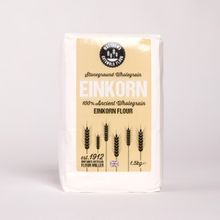
Wholegrain Einkorn Flour 1.5kg - £4.95: Einkorn, one of the earliest cultivated forms of wheat, is prized for its rich, nutty flavour and high levels of protein, vitamins, and antioxidants. Its lower gluten content makes it easier to digest, while still providing a satisfying texture in sourdough loaves.
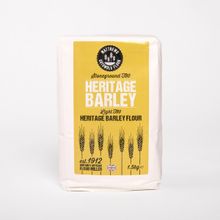
Heritage Barley Flour 1.5kg - £2.95: with its deep, earthy taste, brings a rustic charm to sourdough, enhancing its complexity with a subtle sweetness and a boost of fibre and essential minerals.
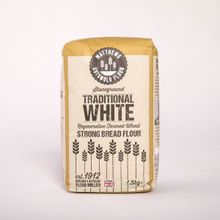
Stoneground Traditional Regenerative Strong Bread Flour 1.5kg - £2.80: Strong white bread flour traditionally stoneground milled in the Cotswolds from regeneratively farmed UK wheat. This flour is perfect for all bread baking. Regenerative agriculture focuses on encouraging soil fertility, maximising biodiversity and reduces chemical inputs.
For more information on Sourdough September visit Cotswold Flour and Real Bread Campaign
For more information on Matthews Cotswold Flour visit www.cotswoldflour.com or follow @CotswoldFlour on Instagram or Facebook.
ENDS
Editor's Notes
For more information, an interview with Matthews Cotswold Flour Managing Director, Bertie Matthews, samples, recipes and images please contact Harry Hook - harry@rawfoodanddrinkpr.co.uk.
Sourdough Master Recipe
By Elaine Boddy
“Sourdough making is a wonderfully slow process; whereas using commercial dried yeast to make bread can produce a loaf within a couple of hours, the sourdough process is longer as starters are not developed for speed, and this is why it tastes so good, as it develops flavour during that time, but also why it's such a great healthy option as the long proving time renders sourdough the healthiest form of bread there is. So from the point of feeding your starter to producing your loaf can encompass up to 24 hours, the actual hands on time is less than 30 minutes.” Elaine Boddy
Sourdough Master Ingredients
- 50g active starter
- 350g water (I use tap water, or see notes in the starter section)
- 500g strong white bread flour
- 7g salt, or to taste
*Makes 1 standard loaf*
You Will Also Need:
- Your starter, fed and ready to go
- Good quality strong white bread flour - I recommend using Churchills White Flour or
our Strong White Bread Flour - Digital scales
- Mixing bowl, ideally 23cm diameter and 9cm deep
- Bowl scraper
- Shower cap, or bowl cover of your choice
- Banneton, 21.5cm diameter/500-750g brotform banneton prepared with rice flour
- Parchment paper - for best results use good quality parchment paper, not waxed or greaseproof paper
- Lame or razor blade
- Enamel roaster pan, 26cm diameter, or other baking pan with a lid.
Master Sourdough Recipe Method
Step 1:
I always begin making my dough between 4-5pm, this is my standard timetable, but as I've stated above, it can be manipulated for your household. At this time, mix all of the ingredients together in your bowl to make a rough dough, with no dry flour showing. Cover the bowl with a shower cap or cover, and leave it for an hour or so on the kitchen counter.
*Return the rest of your starter to the fridge until you need it again, with the lid firmly fitted.
Step 2:
After an hour or so, perform the first set of pulls and folds on the dough to build up its structure. To do this, pick up a small handful of dough from one side of the bowl, using your thumb and two forefingers to grab a portion, lift it, stretch it and fold it over the rest of the dough to the other side of the bowl, turn the bowl a few degrees and repeat the process, lift and fold, turn the bowl, lift and fold, turn the bowl, and continue until the dough comes together into a smoothish ball. Then stop.
Cover the bowl again and leave it out on the kitchen counter. You can now leave the bowl again for an hour, or half an hour, whatever works for you.
Step 3:
Over the next few hours, at intervals that suit you, perform 3 more sets of the lifting and folding action, just enough to bring the dough into a ball; this is the dough telling you when it is time to stop. After each set, cover the bowl and leave it on the counter doing the final set before going to bed.
Step 4:
Leave the covered bowl on the counter overnight to prove. I typically let my dough prove, untouched, for 8 to 10 hours at temperatures of 18-20C. If it is colder where you are it may take longer; if it's warmer, you will need to make amendments to the dough at the start of the process. See below.
Step 5:
Next morning you should have a bowl full of grown dough, look for it to double in size before moving to the next stage, or if you are using a bowl the same size and make as mine, allow your dough to grow and fill the bowl so that the surface is an inch below the edge.
To place the dough into the banneton, do a series of lifts and folds on the dough and bring it into a firm ball again, then lift it into your banneton, placing it smooth side down. At this point be from with the dough, too often people are too gentle with it thinking it will 'harm' the dough. It won't. You need to be firm and pull it into a nice tight ball. The dough will be full of power and resistance and wouldn't let you squash it if you tried so don't be too careful with it. This is what will give your loaf shape.
Cover the banneton with the same cover that you previously used for the dough, and place it in the fridge for a minimum of 3 hours, and up to a maximum of 24, to allow the dough to firm up and develop flavour.
Step 6:
When you are ready to bake, you have two choices: to preheat the oven or bake from a cold start. I bake everything from a cold start, I never preheat the oven, you don't need to either.
If you choose to preheat the oven, preheat it to 220°C fan assisted or 240C non fan. Have an enamel roaster or pan of your choice ready, plus good quality parchment paper.
Step 7:
Remove the cover from the banneton, place your parchment paper over the top of it, place the pan upside down over the top of them both. With one hand under the banneton and one hand on top of the pan, turn it all over together to turn the dough out and into the pan.
Step 8:
With a lame or a clean razor blade, score the dome of the dough cleanly and firmly, at a depth of 0.5 to 1.0 cm. Don't be scared to score deeply, the dough needs this to encourage it to grow as it bakes.
Step 9:
Bake. If you preheated the oven, bake for 50 minutes, keeping the lid on for the entire time. If you are baking from a cold start, place the pan in the cold oven, turn the temperature to 220°C fab or 240C non fan and bake for a total of 55 minutes from the time that you placed the pan in the cold oven, with the lid on the entire time.
After 50 to 55 minutes, remove from the oven. Open the lid to check the loaf, if it's looking pale, place it back in the hot oven, minus the lid, for 5 to 10 minutes to brown the loaf to the colour of your choice.
Once the loaf is golden brown, carefully remove it from the pan, remove the parchment paper from the bottom, and place the loaf on a wire rack.
Step 10:
Leave the loaf on its rack to cool completely. Whichever route you take to bake your loaf, once it is cooling, wait at least 1 hour before you slice into it. If you cut into the loaf too soon, it will still be cooking, plus steam will fill all those carefully crafted holes and make the bread gummy; if you can wait a few hours, it really is worth it.
Bonus Step:
Serve, slather with butter, and enjoy!

